Received some replacment push rods today and made up new pushrod assemblies. I seated the tips without using heat this time. The tips have a slight undercut to get them started, and keeping them square I pounded them in using the two socket method mentioned previously.
Torqued the rocker assemblies with the valve cover nuts. Found that the 8M1.25x25mm bolts provided with the cover were too short. Bought 4 that are 35mm long and they seem to work ok.
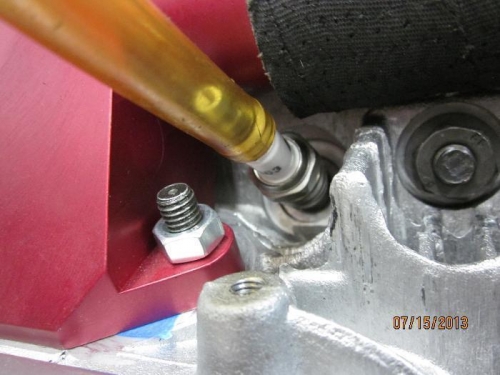
Installed the oil screen assembly and sump plate with the copper seal washers and nylon lock nuts. The holes in the screen needed to enlarged slightly for an easy slide fit of the screen. I have the optional ACV-P02-20 sump plate and installed an oil drain valve and the oil temperature sensor in the sump plate.
Tried to install the oil pump, but the 8M1.25 bolts don't seem to fit the tapped holes in the block very well. Checked with some other builders and they suggested running a tap in. Did that and things worked out fine.
Installed the crankshaft spacers and the rear oil seal.
Gapped the 4 top plugs to .018" and installed them finger tight to keep debris out.
Some recent posts talked about stripping the spark plug holes under the intake manifold. I used some 3/8" ID tubing pushed onto the ceramic to run the plug in finger tight, then used an 11/16" deep socket to tighten it. The socket was cocked slightly but not a problem since the plug was basically seated. Removed the plug by just getting it loose with the socket and backing it out with the tubing.